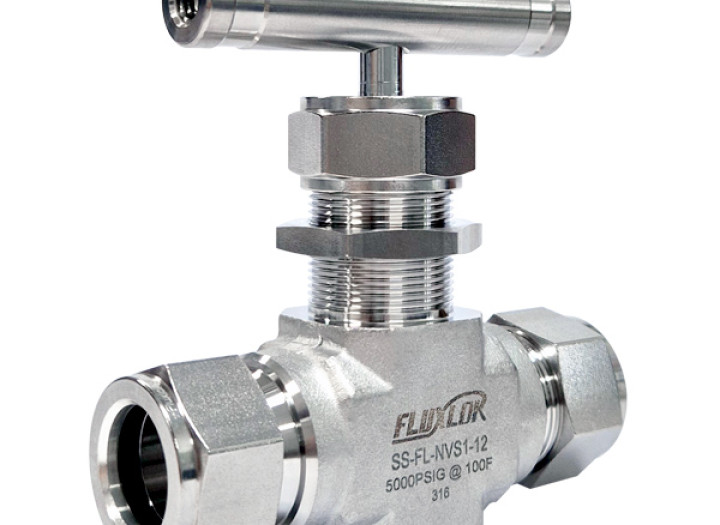
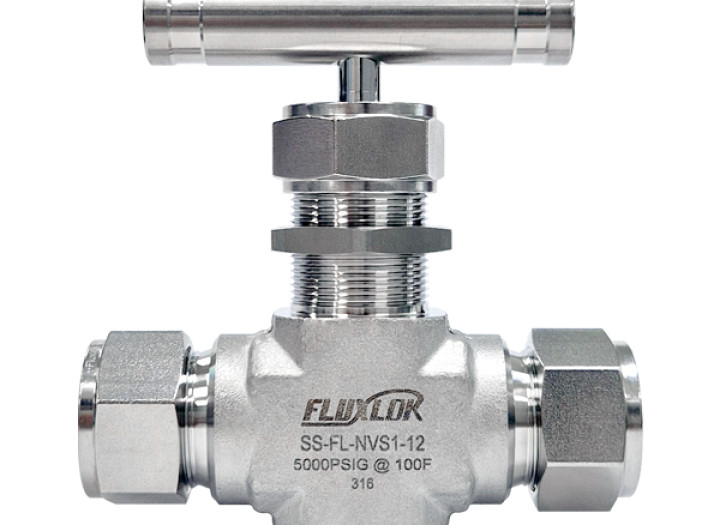


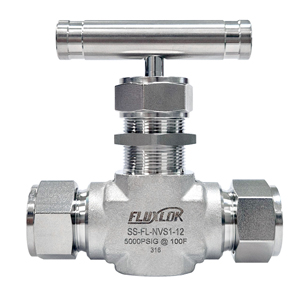
Lok Type Valve Lok Type Needle Valve - NVS1 - 3/4 inch
| 产品名称 | Lok型 针形阀(Lok Type Needle Valve) - NVS1 - 3/4 inch |
|---|---|
| 最高使用压力 | 5,000psig (344bar) at 100°F (38℃) |
| 最高使用温度 | -65°F(54℃ ) to 450°F (232℃) |
| 特点 | 可靠的 Lok 型管接头端, NPT 及 ISO 外螺纹/内螺纹 |
| 特点 | 高温用金属对金属 V 型阀杆 |
| 特点 | 坚固的镀铬阀杆螺纹, 保证长久的使用寿命 |
| 特点 | 可面板安装 |
To list
본문
Detail view
|
| HIFLUX的Lock-fiting产品群FLUXLOK在技术上安装发电站或机械、管道装置,可用于生产、制造产品的复合产业设备--成套设备产业以及化学、炼油、水射流切割机、研究领域、油、天然气等整个产业的各种工艺和系统设备的构成。 |
|
Features为您介绍产品的优点。
|
 最高使用压力 : 5,000psig (344bar) at 100°F (38℃). 最高使用温度 : -65°F(54℃ ) to 450°F (232℃) 可靠的 Lok 型管接头端, NPT 及 ISO 外螺纹/内螺纹 高温用金属对金属 V 型阀杆 坚固的镀铬阀杆螺纹, 保证长久的使用寿命 可面板安装 填料可从外部调整 最高使用压力 : 5,000psig (344bar) at 100°F (38℃). 最高使用温度 : -65°F(54℃ ) to 450°F (232℃) 可靠的 Lok 型管接头端, NPT 及 ISO 外螺纹/内螺纹 高温用金属对金属 V 型阀杆 坚固的镀铬阀杆螺纹, 保证长久的使用寿命 可面板安装 填料可从外部调整
|
|
Specification为您介绍各产品的型号、规格、尺寸。
|
|
所有的尺寸仅用于参考, 和实际尺寸可存在偏差。 详细内容可在客户支援栏里留言或拨打客户中心电话进行咨询。
|
|
Structure为您介绍各产品的结构图。
|
|||||||||||||||||||||||||||||||||||||||||||||||||||||||
 |
|||||||||||||||||||||||||||||||||||||||||||||||||||||||
|
|||||||||||||||||||||||||||||||||||||||||||||||||||||||
|
Information为您介绍产品详细信息。
|
|||||||||||||||||||||||||||||||||||||||||||||
温度-压力额定值
|
|||||||||||||||||||||||||||||||||||||||||||||
| Panel Mounting |
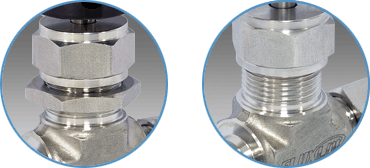 |
| 分解 1. 在手柄上松开无头螺栓并拆除手柄。 2. 拆下密封(Packing)固定螺母,拆下面板螺母。 3. 将阀门插入面板孔中。 重新组装4. 重新装配已拆下的面板螺母。 5. 重新装配密封(Packing)固定螺母。(不给扭矩值,仅用手固定) 6. 将手柄装配到原来的位置,确认螺钉(杆)是否存在异常。 7. 将密封(Packing)固定螺母按照扭矩值装配后确认有无异常。 |
|
Assembly为您介绍试穿和管子的组装过程。
|
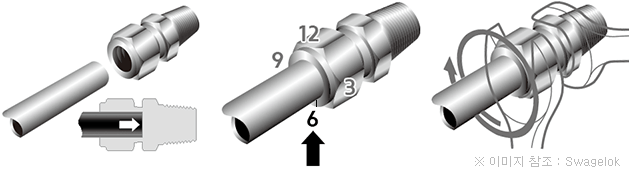 1. 把卡套管完全插入接头内并顶住肩部;用手指将螺母拧紧. 2. 在 6 点钟的位置给螺母作标记. 3. 牢牢固定接头本体, 将螺母紧固一又四分之一圈以停在 9 点钟的位置. |
|
Application请确认一下适用于各个领域的产品。
|
|
可用于化学,化工,天然气等多种产业领域 安装时不会把扭矩传输到卡套管上. 极佳的气体密封和卡套管抓紧作用 |
 |